QuickBooks
Learn how to back up your accounting data in QuickBooks Desktop.
Have you created a backup of your company file? Think of it as a save point for your accounting data. If you ever run into problems, you can use your backup to restore your data.
Note: If you don't need a full backup and just want to move your accounting data, create a portable company file. Follow these steps if you use Intuit Data Protect to back up your company files.
Step 1: Create a backup company file
Backup company files save everything currently in your company file. This includes your accounting data, templates, letters, logos, images and related files (QuickBooks Statement Writer, Cash Flow Projector, Business Planner and Loan Manager). However, it doesn't back up your payroll forms (more on that later).
There are two ways to back up your data. You can schedule automatic backups or back up your files manually.Schedule automatic backups
Instead of manually backing up your company file, let QuickBooks do it automatically.
- In QuickBooks, go to the File menu and select Switch to Single-user Mode.
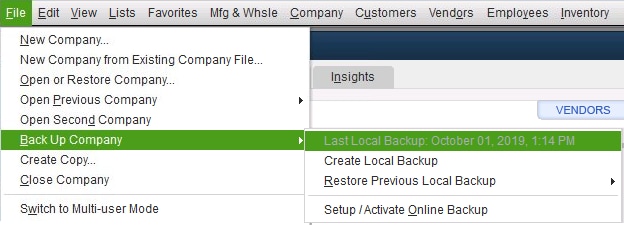
- Go to the File menu again and hover over Back up Company. Then select Create Local Backup.
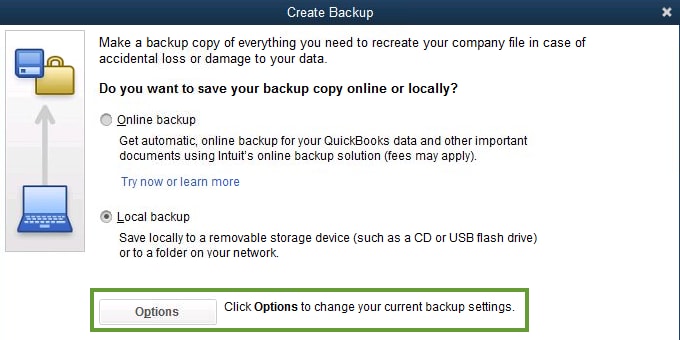
- In the window, select Local Backup and then Next.
- In the Local Backup Only section, select Browse and select where you want to save your backup company file.
- Set the number of backups you want to keep. (This is optional.)
- In the Online and Local Backup section, select Complete verification. This runs a test to make sure your backup file is in good shape before you save.
- When you're ready, select OK.
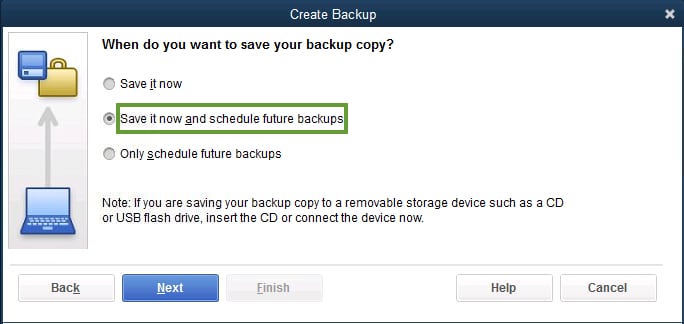
- Select Save it now and schedule future backups and then Next. Or if you don't want to save a backup now, select Only schedule future backups.
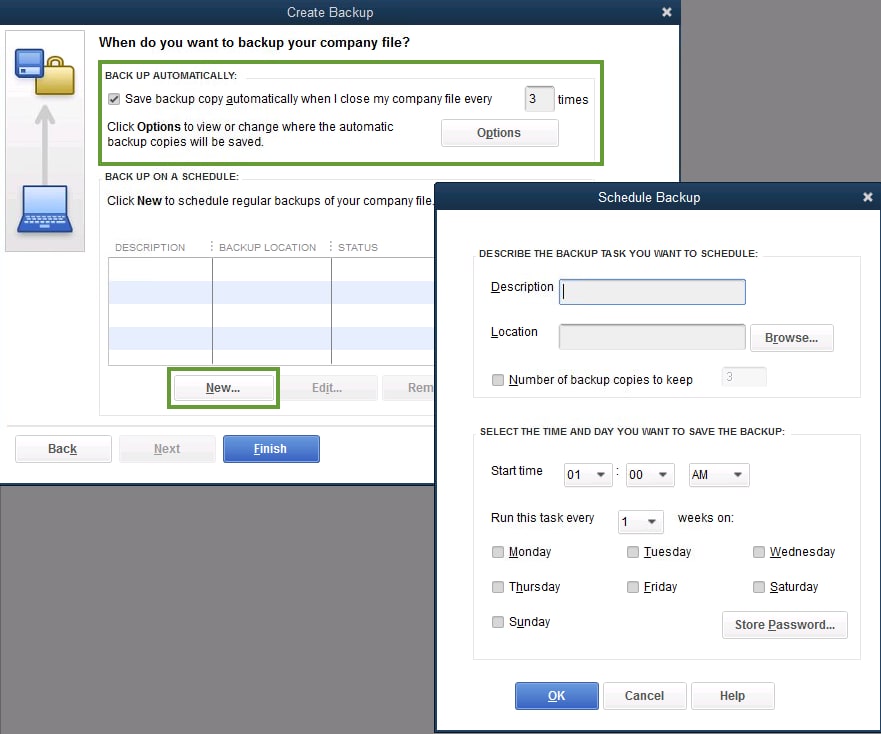
- Select the Save backup copy automatically when I close my company file checkbox. Then select the number of times between backups.
- To create a schedule, select New. Fill out the data fields to create a backup schedule. You can set a specific time or day of the week.
-
After you set your schedule, select OK. QuickBooks asks you to enter your Windows sign-in password. This gives QuickBooks permission to run the scheduled backup.
-
When you're ready to create your backup, select Finish.
Tip: No need to pencil it in on your calendar. Use the options in the Online and Local Backup section to set backup reminders.
QuickBooks creates a backup and schedules your future backups at the same time. When it's done, you get a confirmation message.
Back up your company file manually
If you prefer, you can back up your company files yourself anytime.
- In QuickBooks, go to the File menu and select Switch to Single-user Mode.
- Go to the File menu again and hover over Back up Company. Then select Create Local Backup.
- In the window, select Local Backup and then Next.
- In the Local Backup Only section, select Browse and select where you want to save your backup company file.
- Set the number of backups you want to keep. This is optional.
- This runs a test to make sure your backup file is in good shape before you save.
- When you're ready, select OK.
- Select Save it now and Next.
Tip: No need to pencil it in on your calendar. Use the options in the Online and Local Backup section to set backup reminders.
QuickBooks creates a single backup company file. When it's done, you get a confirmation message.
Step 2: Adjust your backup settings
Learn how to back up your payroll forms.
Wondering when you last backed up your company file? Go to the File menu and hover over Back up Company. You'll see the time and date at the top of the menu.
If you want to change your backup preferences:
- Select the File and hover over Back up Company. Then select Create Local Backup.
- Select Options.
- Make your changes and select OK.
Next steps: Restore your backup
Now you have a backup company file you can use to restore your company file. This file has a .qbb extension at the end of the file name.
Important: If you keep your backup company files on an external device or a hosting service like Box, you'll need to move them to your local hard drive first before you restore.
Simply Accounting (Sage 50)
How do I create a backup in Simply Accounting?
To do a backup, open your data file.
- Make sure you are logged into the company you wish to backup.
- If you have Sage 50 Premium or Quantum, be in single-user mode under sysadmin.
- Click on File, Backup.
- You can also click on the Backup icon (looks like a file cabinet) from the toolbar on the top of the Home screen.
- In the 'Sage 50 Accounting - Backup' window, enter the file name.
- It would be a good idea to include the date as part of this name (ex. UC141222)
- Select the folder where you want to save the backup
- Please DO NOT put the file location within the .SAJ folder as this is the folder that the software backs up.
- The last-used backup file path is saved and becomes the default for the next backup.
- Do not overwrite an existing backup unless you know for sure that is what you want to do.
- Click OK to start the backup.